3D Blocking for Environments in Blender and Photoshop: A Step-by-Step Guide
In the world of 3D art and design, creating realistic environments is a crucial skill for artists, game developers, and filmmakers. One of the most effective techniques for building these environments is 3D blocking. This process involves using basic shapes and models to construct a scene before adding details or textures. In this article, we’ll explore how 3D blocking works, why it’s important, and how you can use tools like Blender and Photoshop to bring your ideas to life.
What Is 3D Blocking?
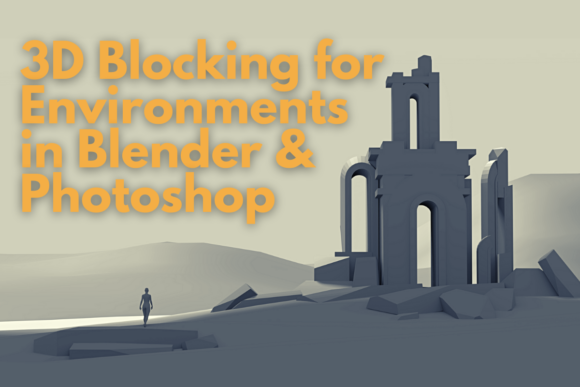
3D blocking is the initial stage of 3D modeling where artists create a rough layout of a scene using simple geometric shapes. This method allows creators to visualize the composition, scale, and spatial relationships within a scene before moving on to more detailed work. It's like sketching with 3D objects instead of pencils and paper.
Blocking is especially useful in environments because it helps artists plan out elements such as buildings, terrain, and lighting. By focusing on the big picture first, you can avoid getting bogged down by small details too early in the process.
Why 3D Blocking Matters
There are several reasons why 3D blocking is an essential part of the design process:
- Saves Time: By planning your scene ahead of time, you can avoid unnecessary revisions later.
- Improves Composition: Blocking helps you experiment with different layouts and perspectives before committing to a final design.
- Enhances Collaboration: When working with a team, a blocked scene provides a clear reference point for everyone involved.
Whether you're designing a video game level, a movie set, or a virtual reality experience, 3D blocking ensures that your environment is both functional and visually appealing.
How to Start with 3D Blocking in Blender
Blender is a powerful open-source 3D creation software that supports modeling, animation, and rendering. To begin with 3D blocking in Blender, follow these steps:
- Import Your Sketch: Start by importing a 2D sketch or concept art into Blender. This will serve as a guide for your 3D blockout.
- Create Basic Shapes: Use primitive shapes like cubes, cylinders, and spheres to represent different elements of your scene. For example, a cube could be a building, and a cylinder might be a tree.
- Adjust Scale and Position: Make sure all objects are properly scaled and positioned according to your sketch. This helps maintain the correct proportions and spatial relationships.
- Add Lighting: Once your basic shapes are in place, add simple lights to simulate the mood and atmosphere of your scene.
- Render the Scene: Render your blocked-out scene to get a sense of how it looks before adding textures or details.
This process may seem simple, but it's a critical step that sets the foundation for your entire project.
The Role of Photoshop in Finalizing Your Scene
After you’ve created your 3D blockout in Blender, the next step is often to refine it in Photoshop. While Blender handles the 3D modeling and rendering, Photoshop allows you to enhance the final image with color grading, compositing, and other visual effects.
Here’s how Photoshop can help:
- Color Correction: Adjust the colors and tones of your rendered image to match your artistic vision.
- Adding Details: Use brushes and layers to add small details like foliage, weather effects, or atmospheric perspective.
- Compositing: Combine multiple renders or elements to create a more dynamic and realistic scene.
By using Photoshop as a final pass, you can elevate your 3D blockout from a rough prototype to a polished piece of art.
Real-World Applications of 3D Blocking
3D blocking isn’t just for artists—it has practical applications across various industries. Here are a few examples:
- Game Development: Game designers use 3D blocking to plan levels and ensure that players have a smooth and engaging experience.
- Architecture: Architects use 3D blockouts to visualize building designs before construction begins.
- Advertising: Marketers use 3D blocking to create compelling visual concepts for campaigns and product showcases.
As technology continues to evolve, the importance of 3D blocking is only growing. Whether you’re a beginner or an experienced designer, mastering this technique can significantly improve your workflow and creativity.
Common Misconceptions About 3D Blocking
Despite its benefits, there are some common misunderstandings about 3D blocking:
- Misconception: It’s Only for Beginners: While 3D blocking is great for beginners, even seasoned professionals use it to plan complex scenes.
- Misconception: It’s Not Important: Some artists skip the blocking phase, thinking it’s unnecessary. However, this can lead to disorganization and wasted time later on.
- Misconception: It’s Too Simple: Blocking may seem basic, but it requires careful planning and attention to detail to be effective.
Understanding these misconceptions can help you appreciate the value of 3D blocking and use it more effectively in your own projects.
Getting Started with 3D Blocking
If you're new to 3D blocking, here are a few tips to help you get started:
- Start Small: Begin with simple scenes and gradually move on to more complex ones as you gain confidence.
- Use References: Study real-world environments or existing artwork to understand how different elements interact.
- Experiment: Don't be afraid to try different shapes, lighting setups, and compositions. The goal is to explore and learn.
With practice and patience, you'll find that 3D blocking becomes an invaluable tool in your creative process.
Conclusion
3D blocking is a fundamental technique that every 3D artist should master. By using tools like Blender and Photoshop, you can efficiently plan and visualize your environments before diving into the details. Whether you're working on a game, film, or architectural project, 3D blocking helps you create more cohesive and professional results.
As you continue to develop your skills, remember that the key to success lies in understanding the basics and applying them thoughtfully. With the right approach, 3D blocking can become a powerful asset in your creative toolkit.